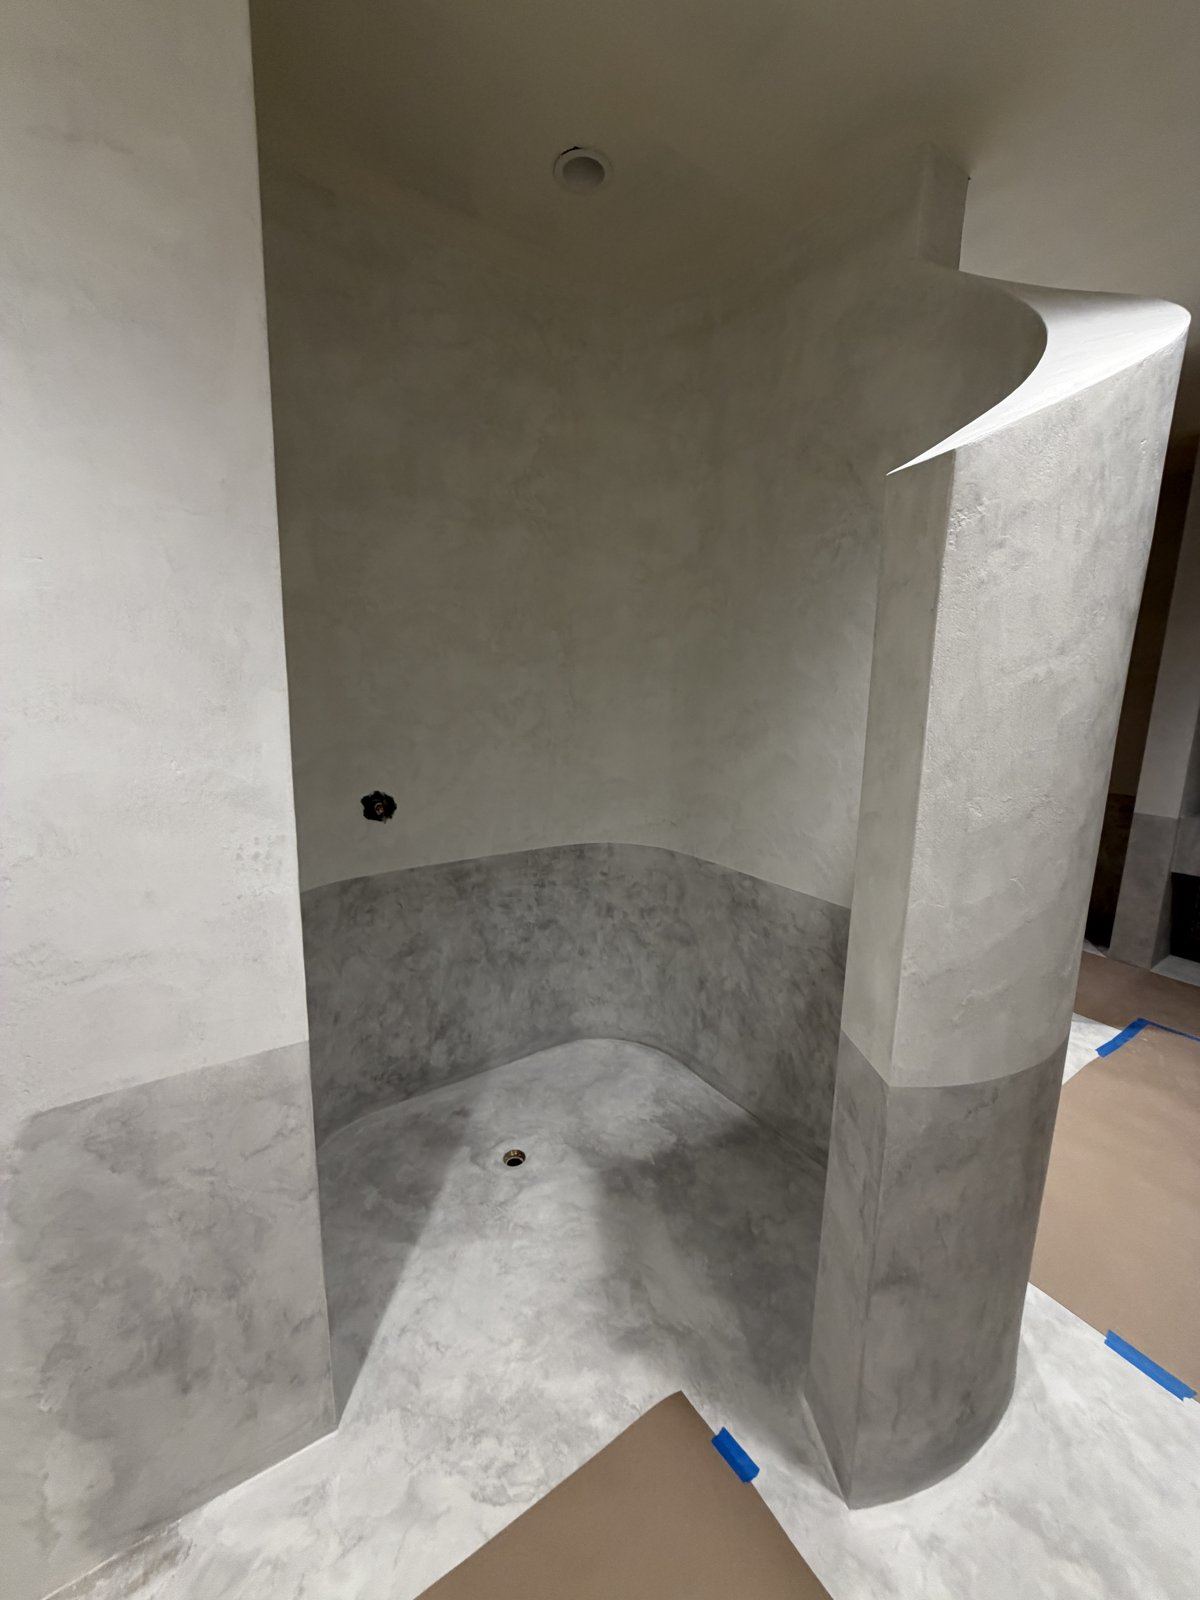
Micro cement shower: what it is, how it's applied, how to care for it
A micro cement shower has walls and a floor made of one seamless, hand-troweled surface instead of tile and grout. It goes on in thin coats over a base that is flat, sound, and fully waterproofed, then gets sealed in several coats so it is waterproof and easy to clean.
If you have seen a shower that looks like soft, continuous stone with no grout lines anywhere, that is probably what you were looking at. Here is what it is, how we build one, and how you live with it afterward.
What micro cement is
Micro cement is a thin, cement-based coating applied by hand. It turns a wall, floor, or shower into one continuous surface, with custom color, texture, and marbling.
It is not a tile, and it is not paint. Think of it as a plaster built up in thin layers, each one troweled on by hand, then sealed. The finished surface is only a few millimeters thick, so it goes over a wall or a floor without changing the size of the room.
Why people choose it for a shower
No grout lines. A tile shower has hundreds of them. Grout is where the cleaning happens, and it is where a rushed install shows first. A micro cement shower has none.
Curves. Micro cement follows whatever shape the wall is. A curved shower wall or a rounded corner is hard to do in tile and natural in micro cement.
A color that is yours. The color is mixed to your sample, and the marbling comes from the trowel, so no two walls are the same.
The base underneath
A micro cement shower is built on the same foundation as a tile shower. The base has to be flat, sound, and waterproofed, similar to how we prepare a shower for tile.
That means the shower floor is sloped to the drain, and the walls and floor get a full waterproofing system, floor to ceiling, before the first coat goes on. Not just a coat of something on the walls, but a system planned for function.
People ask whether micro cement cracks. It does not when the surface under it is prepped properly. That's most of the job. The coating is thin, so it can only be as sound as what it is sitting on, the same rule that applies to tile.
How it is applied
Micro cement goes on by hand in thin coats. Each coat is troweled on and left to dry before the next, which is why a shower takes several days to a week rather than a single afternoon.
The color is mixed to your sample before the first coat. The texture and marbling come from the trowel as each coat goes on, which is why the surface has movement in it instead of looking like a painted wall.
After the installation is completed, we apply additional sealer coats for ease of cleaning and protection of the surface. The sealer is what makes the finished shower waterproof on the surface and simple to wipe down.
Micro cement and tile together
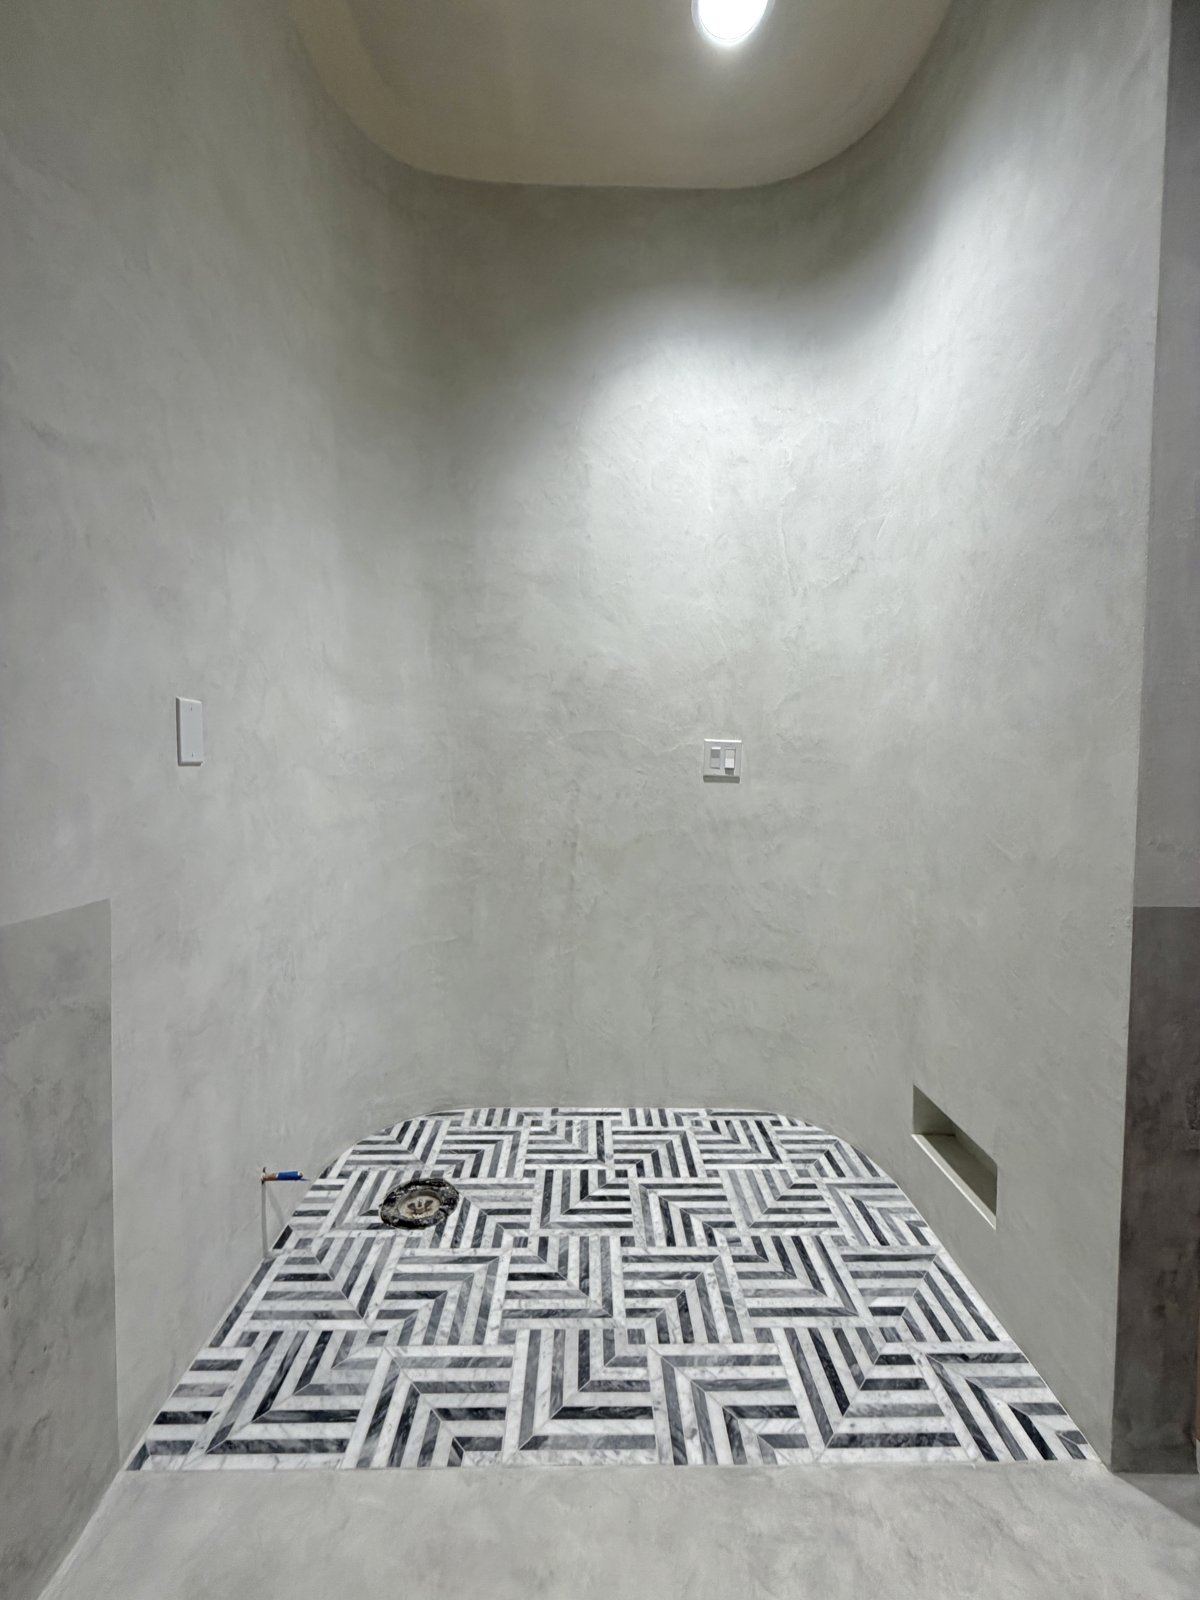
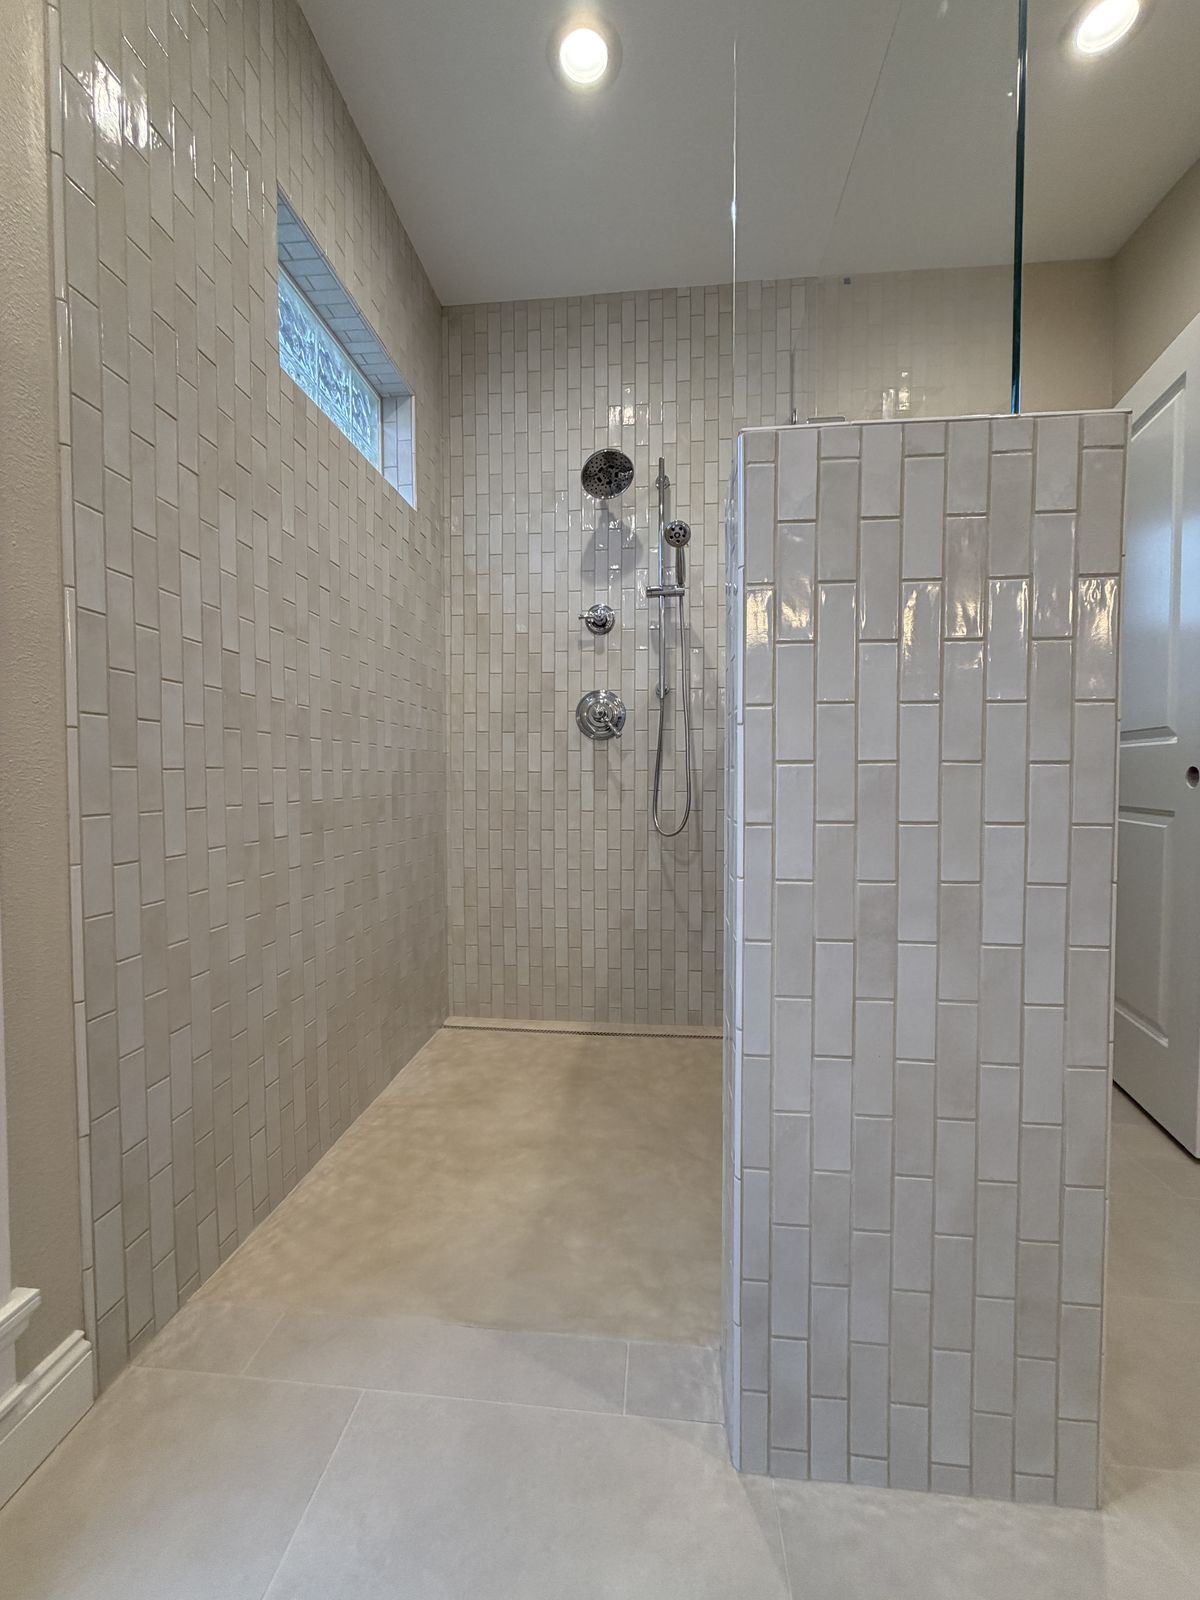
A shower does not have to be all one or the other. Micro cement walls over a marble mosaic floor give you a seamless wall with a floor that has grip underfoot. A micro cement floor under tile walls does the opposite: one clean, grout-free floor with the pattern up on the wall.
Both are built the same way underneath. The pan is sloped, the waterproofing runs floor to ceiling, and the two surfaces meet on a base that was planned for both.
How to care for it
Clean it like a countertop. A soft cloth and a mild cleaner. There is no grout to scrub, which is most of what people are glad to leave behind.
Skip abrasive pads and harsh or acidic cleaners. Those wear on any sealed surface, and the sealer is what you are protecting. Before we hand the shower back, we go through the room detail by detail and talk through care before we leave.
Where else it works
Shower walls and floors. Bathroom floors and walls. Fireplace surrounds. Feature walls. Countertops and vanity tops. Micro cement can be installed anywhere you want a soft, seamless, modern surface instead of tile and grout. We have built a micro cement range hood and an arched micro cement vanity with micro cement sinks.
Questions people ask
Is micro cement waterproof?
Yes. We waterproof the base first and seal the finished surface in several coats, so it works in showers and on bathroom floors.
Does micro cement crack?
Not when the surface under it is prepped properly. That's most of the job. The base has to be flat, sound, and waterproofed before the first coat goes on.
How long does a micro cement shower take?
It goes on in coats with drying time between them, so plan on several days to a week for a shower. The waterproofed base is built before that, the same way we prepare a shower for tile.
Can you match a color?
Yes. The color is mixed to your sample, and the marbling is done by hand, so every wall is one of a kind.
Thinking about a micro cement shower?
One seamless surface, no grout lines, built on the same waterproofed base as every shower we do. Read more on our micro cement page, call (208) 306-4004, or send us a quote request. We reply within one business day.
Every project is covered by our 2-year workmanship warranty, and enrolled in manufacturer lifetime warranties where applicable.
*Header photo: curved micro cement shower, hand-troweled walls, curves and all. Timeless Creations project.*


