Herringbone Backsplash Installation Checklist!
“Herringbone is a timeless tile installation pattern which will always remain in style.” - Micah Kissee
Herringbone Installation Checklist!
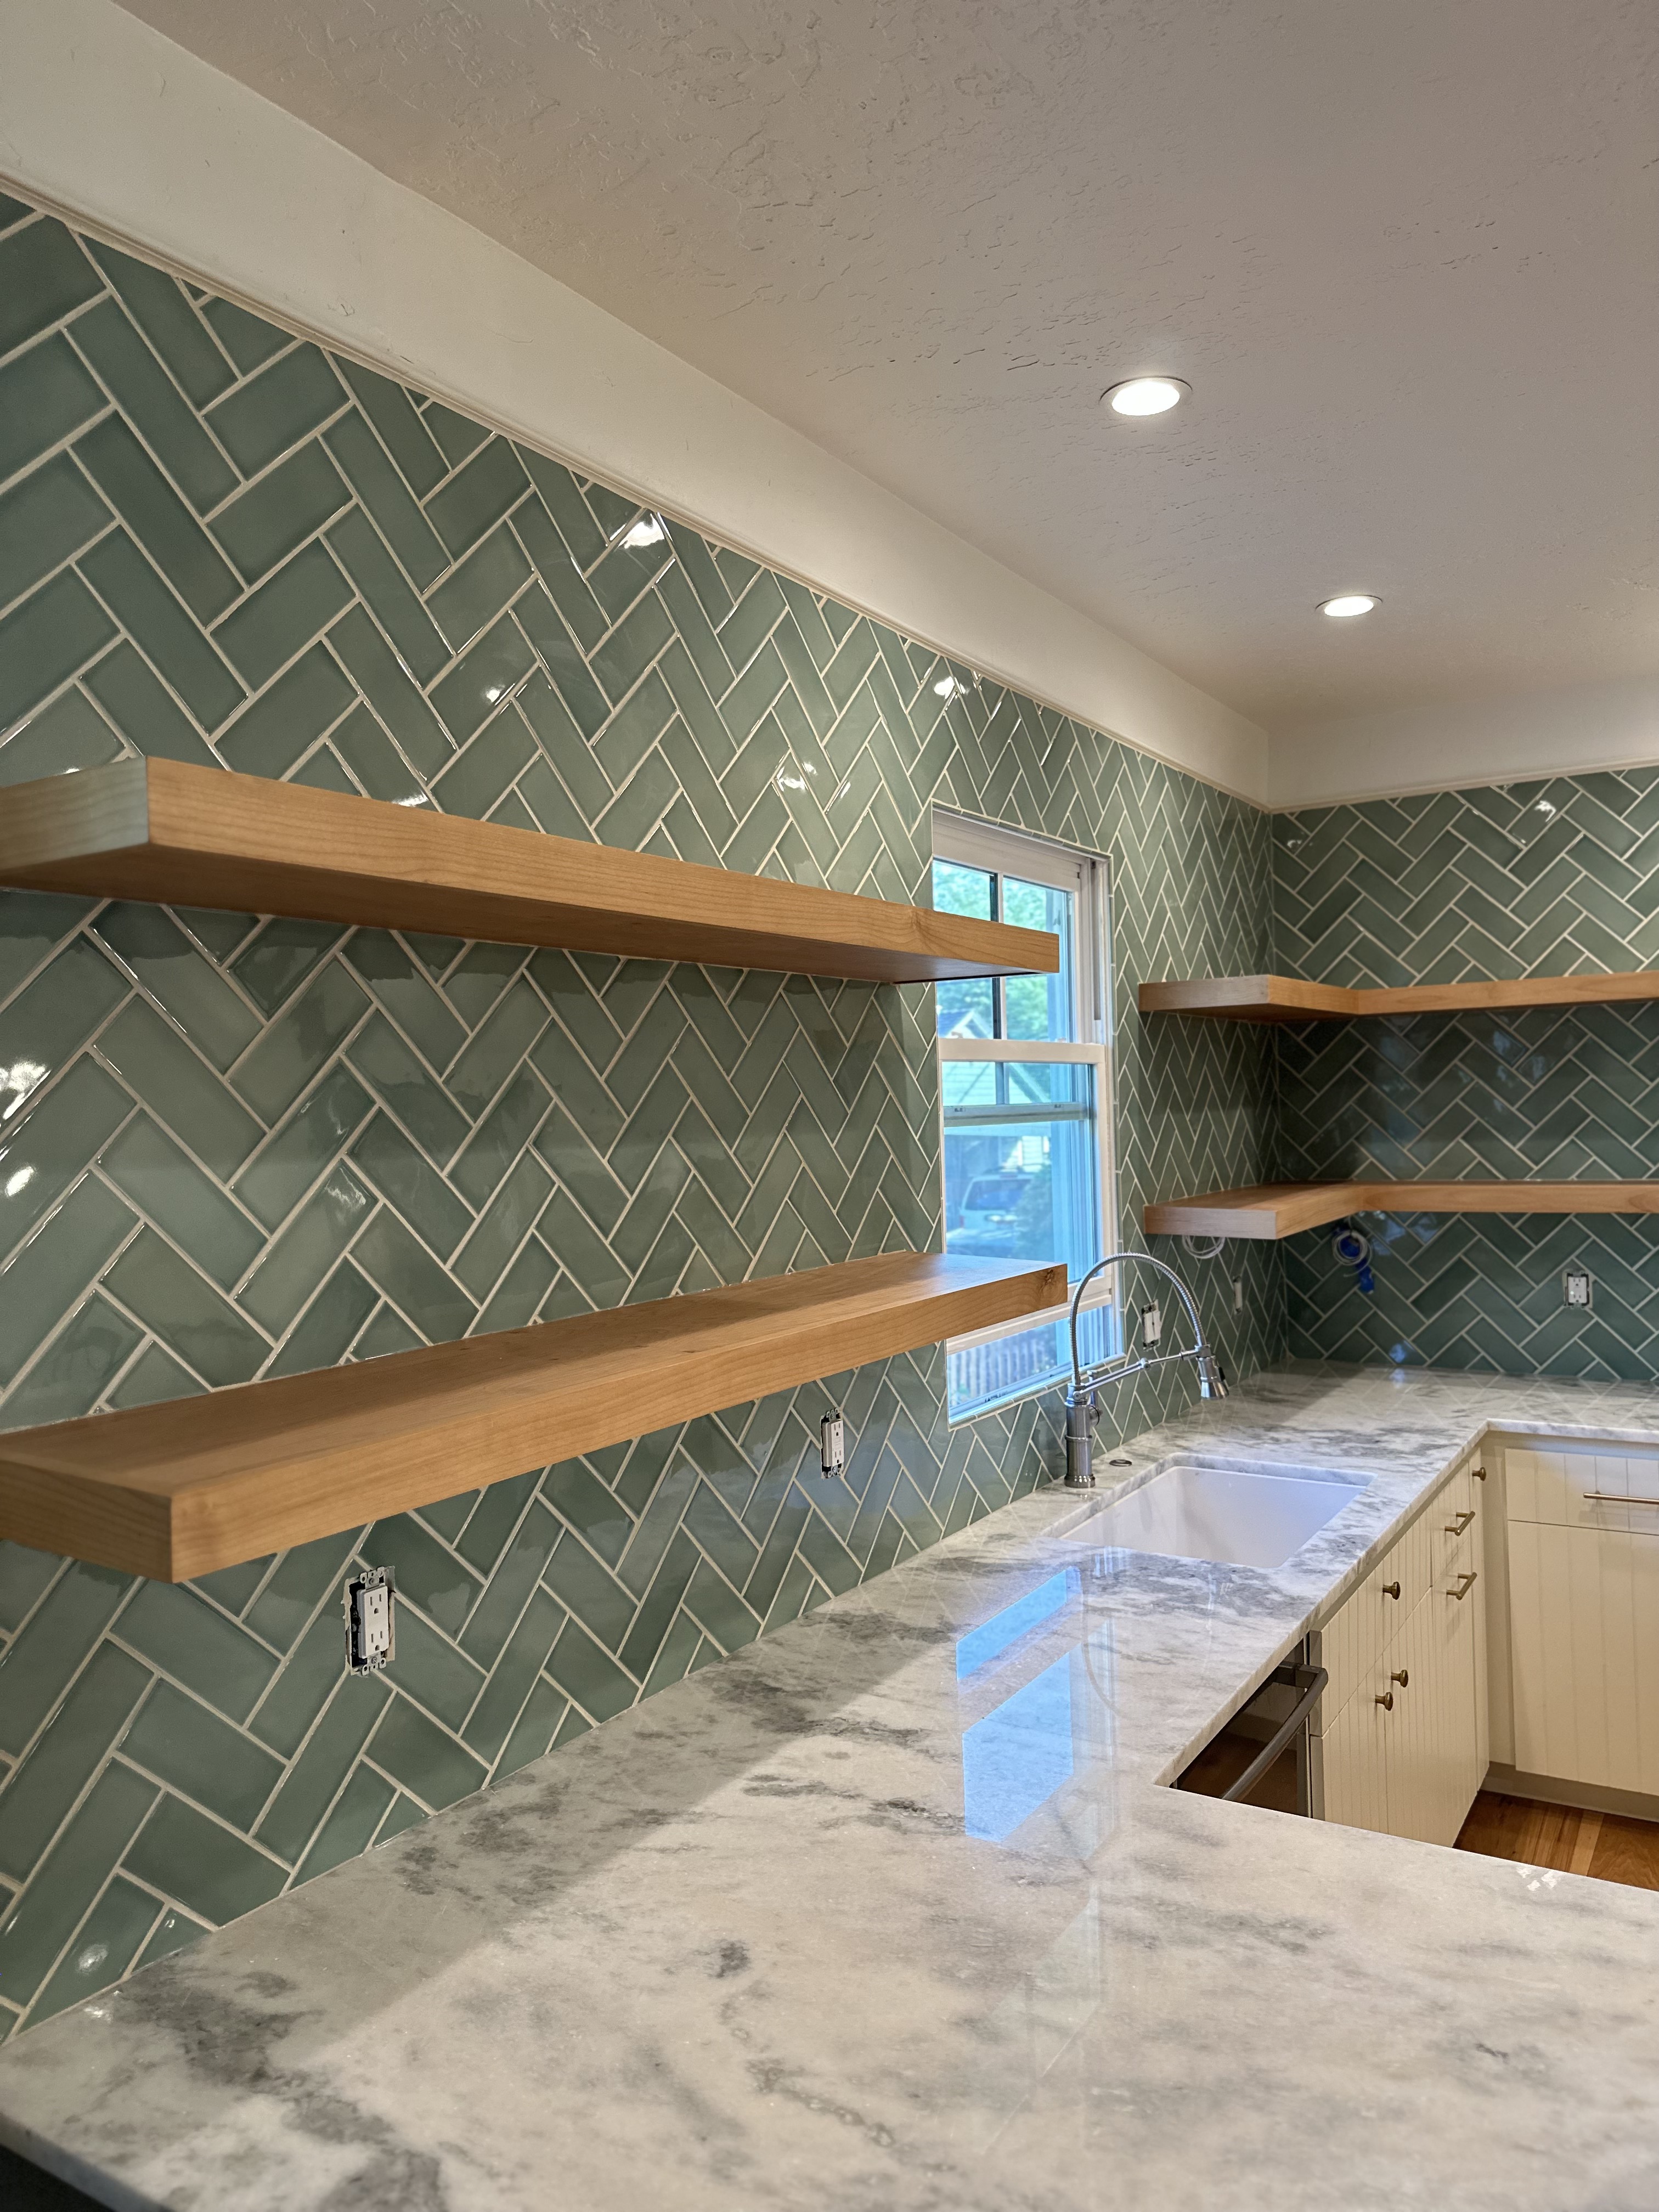
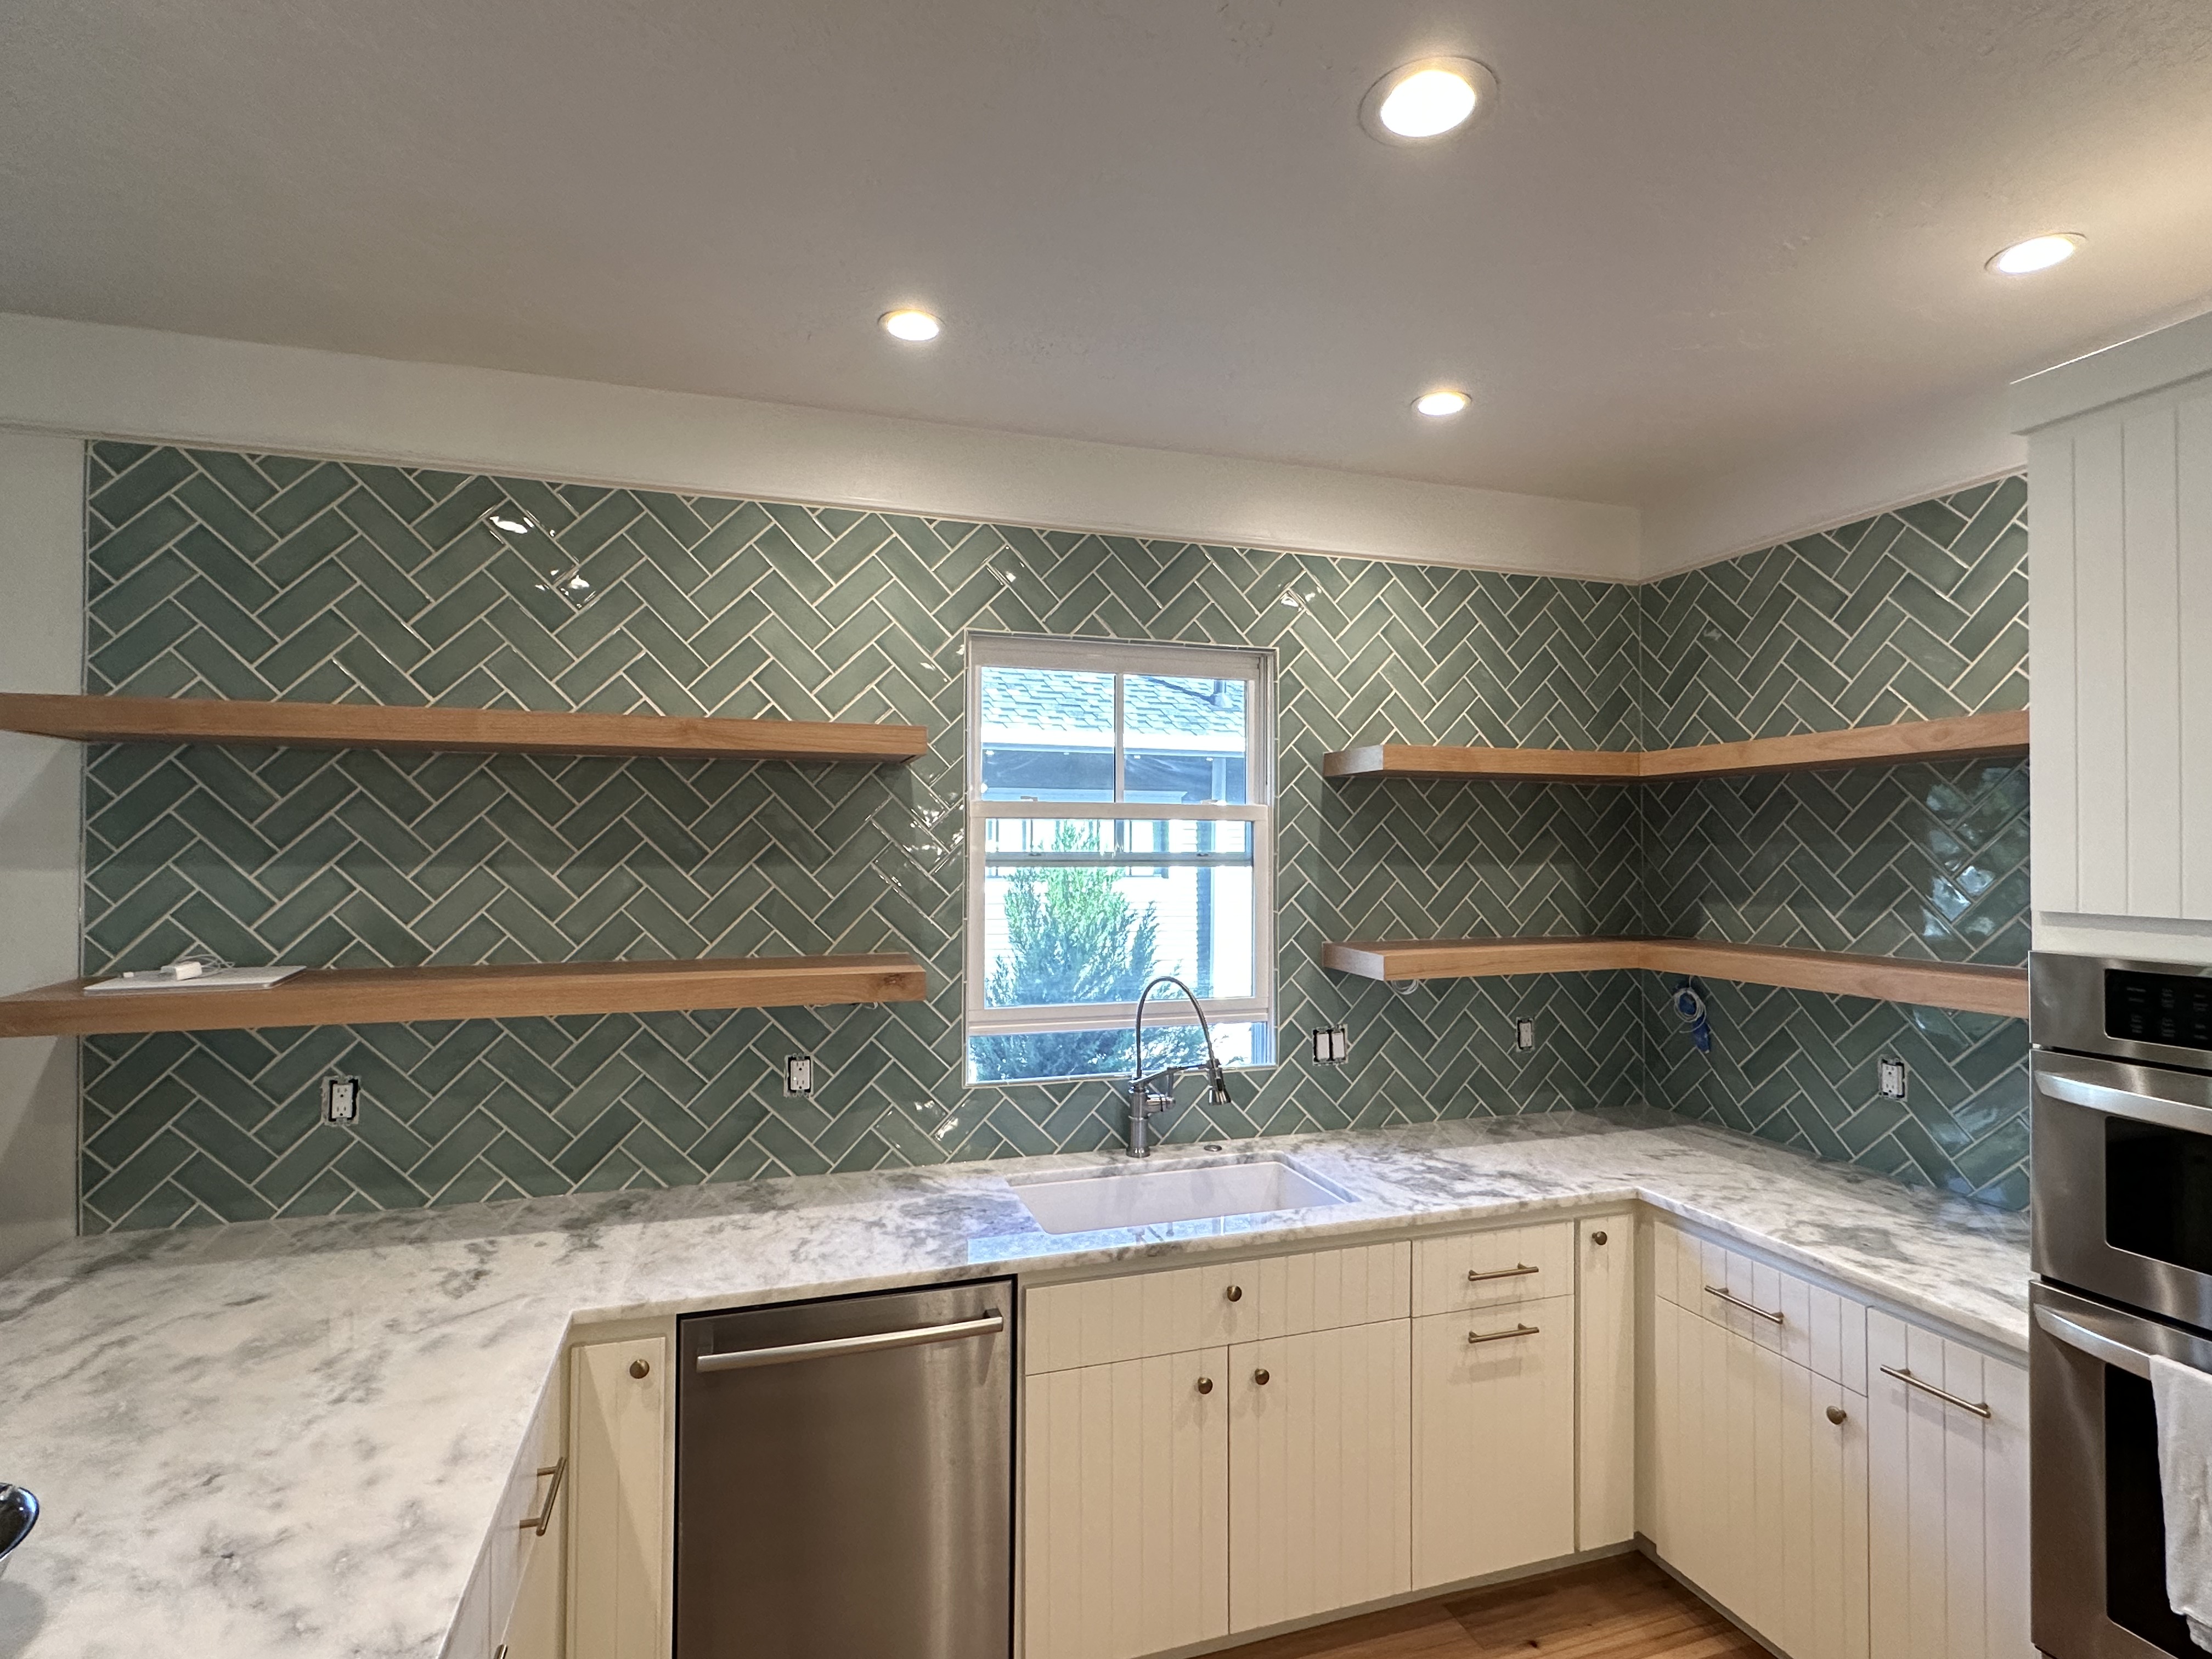
We recently completed a stunning herringbone installation in a Northend Boise Idaho Kitchen.
This Installation was done with handmade ceramic tiles which were provided by The Tile House in Garden City Idaho, and on a remodel for our good friends over at Merrick Construction and Design!
While doing the install we made a list of things to think about when attempting one of these herringbone patterns on your own!

With that said, lets jump into the list! 👊
1. Start the pattern with pre cut pieces of the same size...
Start the pattern on the bottom row with the same sized pieces, when spaced correctly, they should create a 90* fold in the corner. Long levels should be placed all across the tops of all the pieces in the first complete row in order to ensure herringbone is installed level and and the pieces were all cut the same.
(I suggest laying out the pattern on the ground first, and using a level to draw a line and create your starting pieces)
2. Dealing with Obstacles...
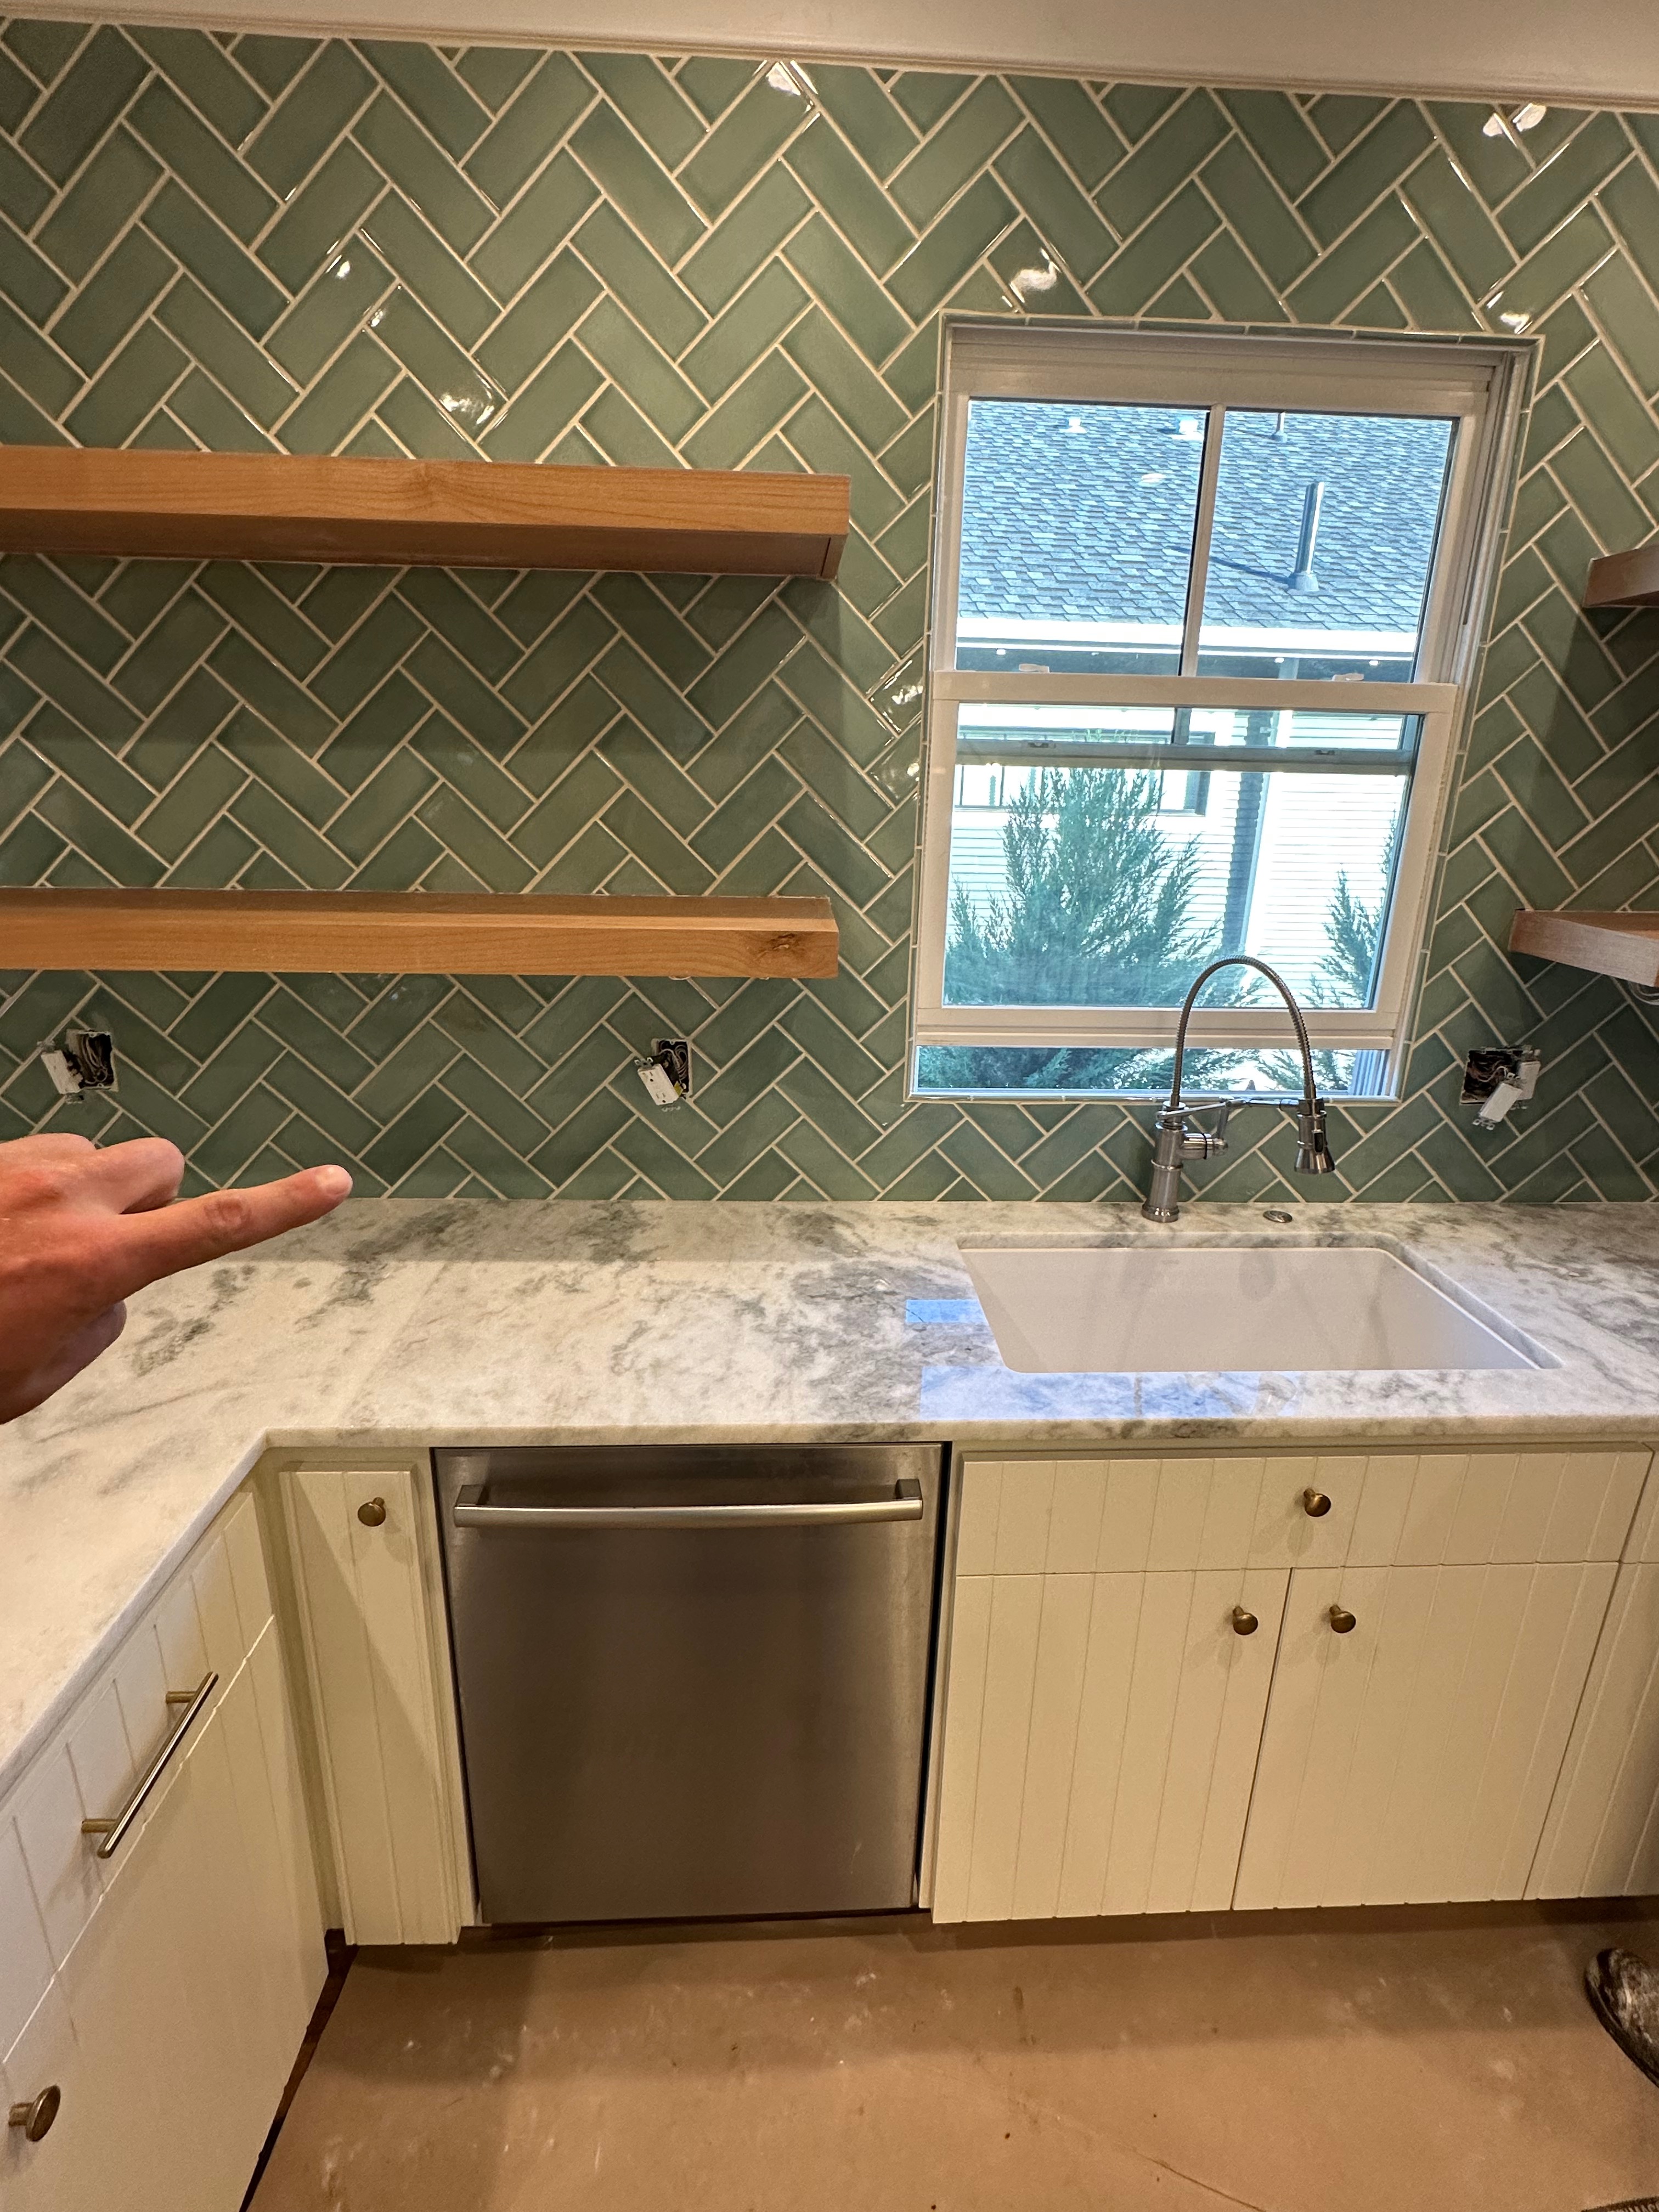
When encountering an obstacle like a window or shelf, is the pattern laid out in a way which creates equal cuts on both sides of the obstacle? (Careful planning must be done prior to starting the pattern to ensure this is correct.) You want the herringbone to be uniform on all sides of any obstacles
3. Fold the pattern...
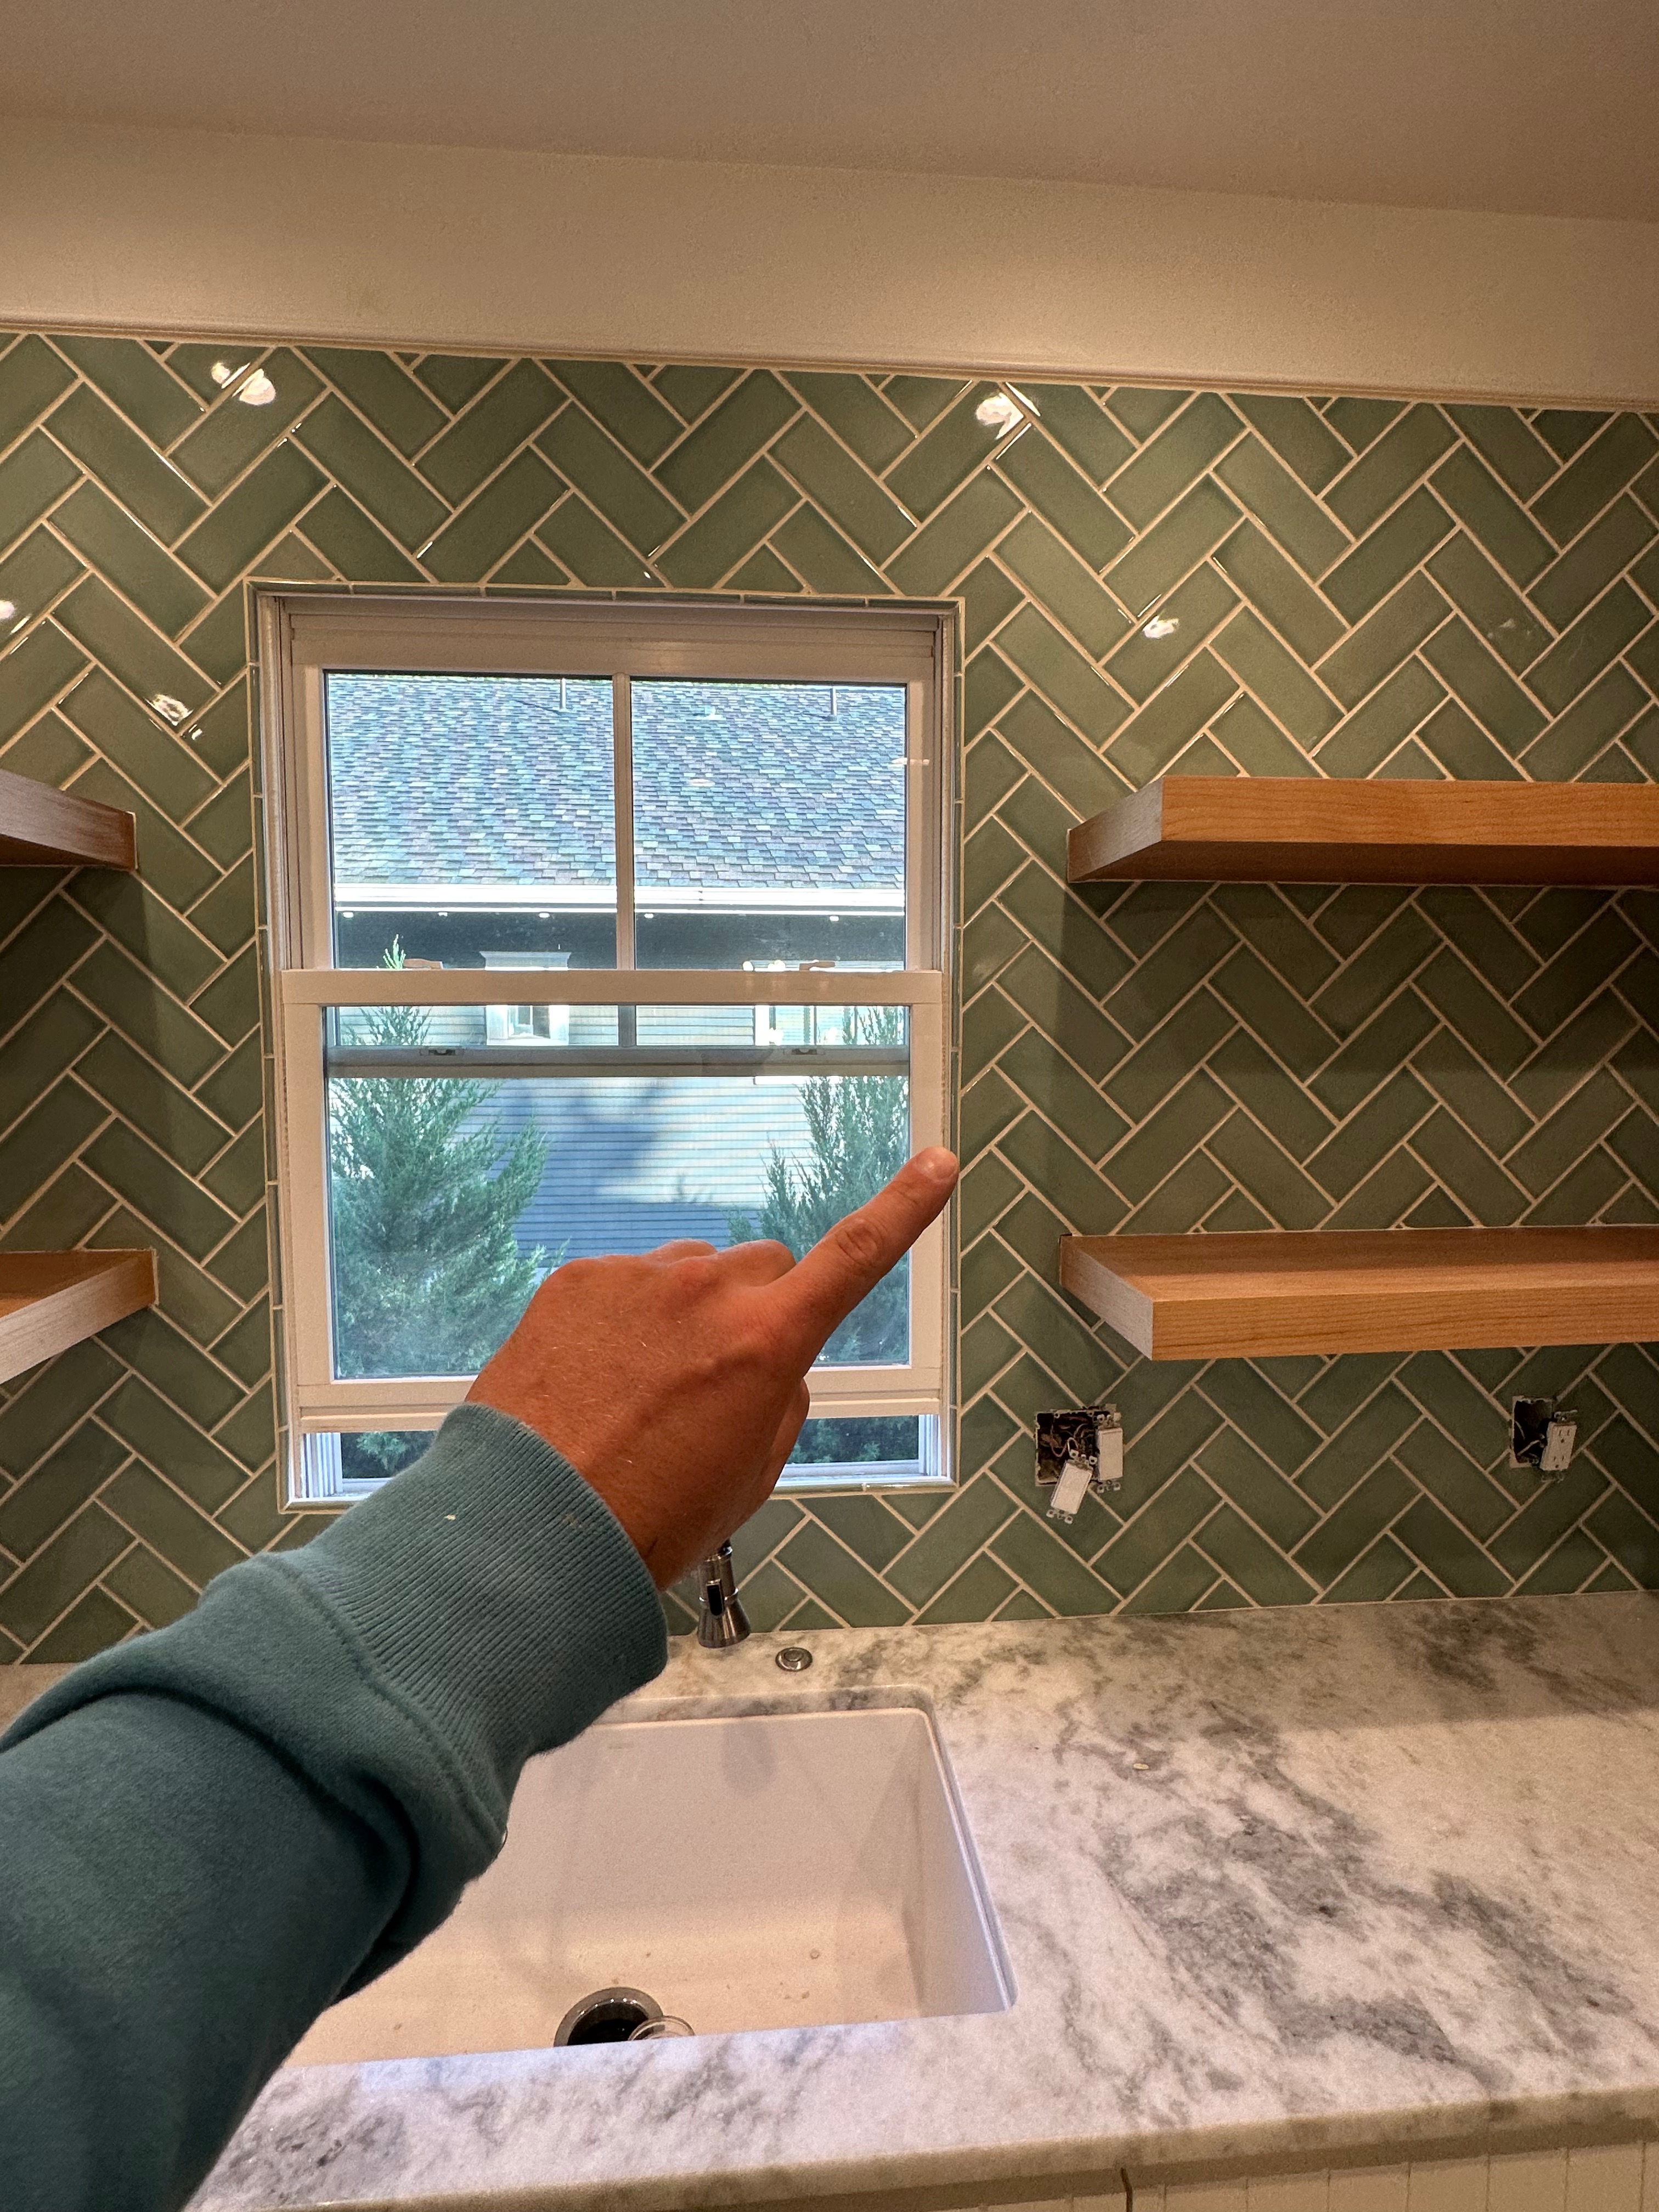
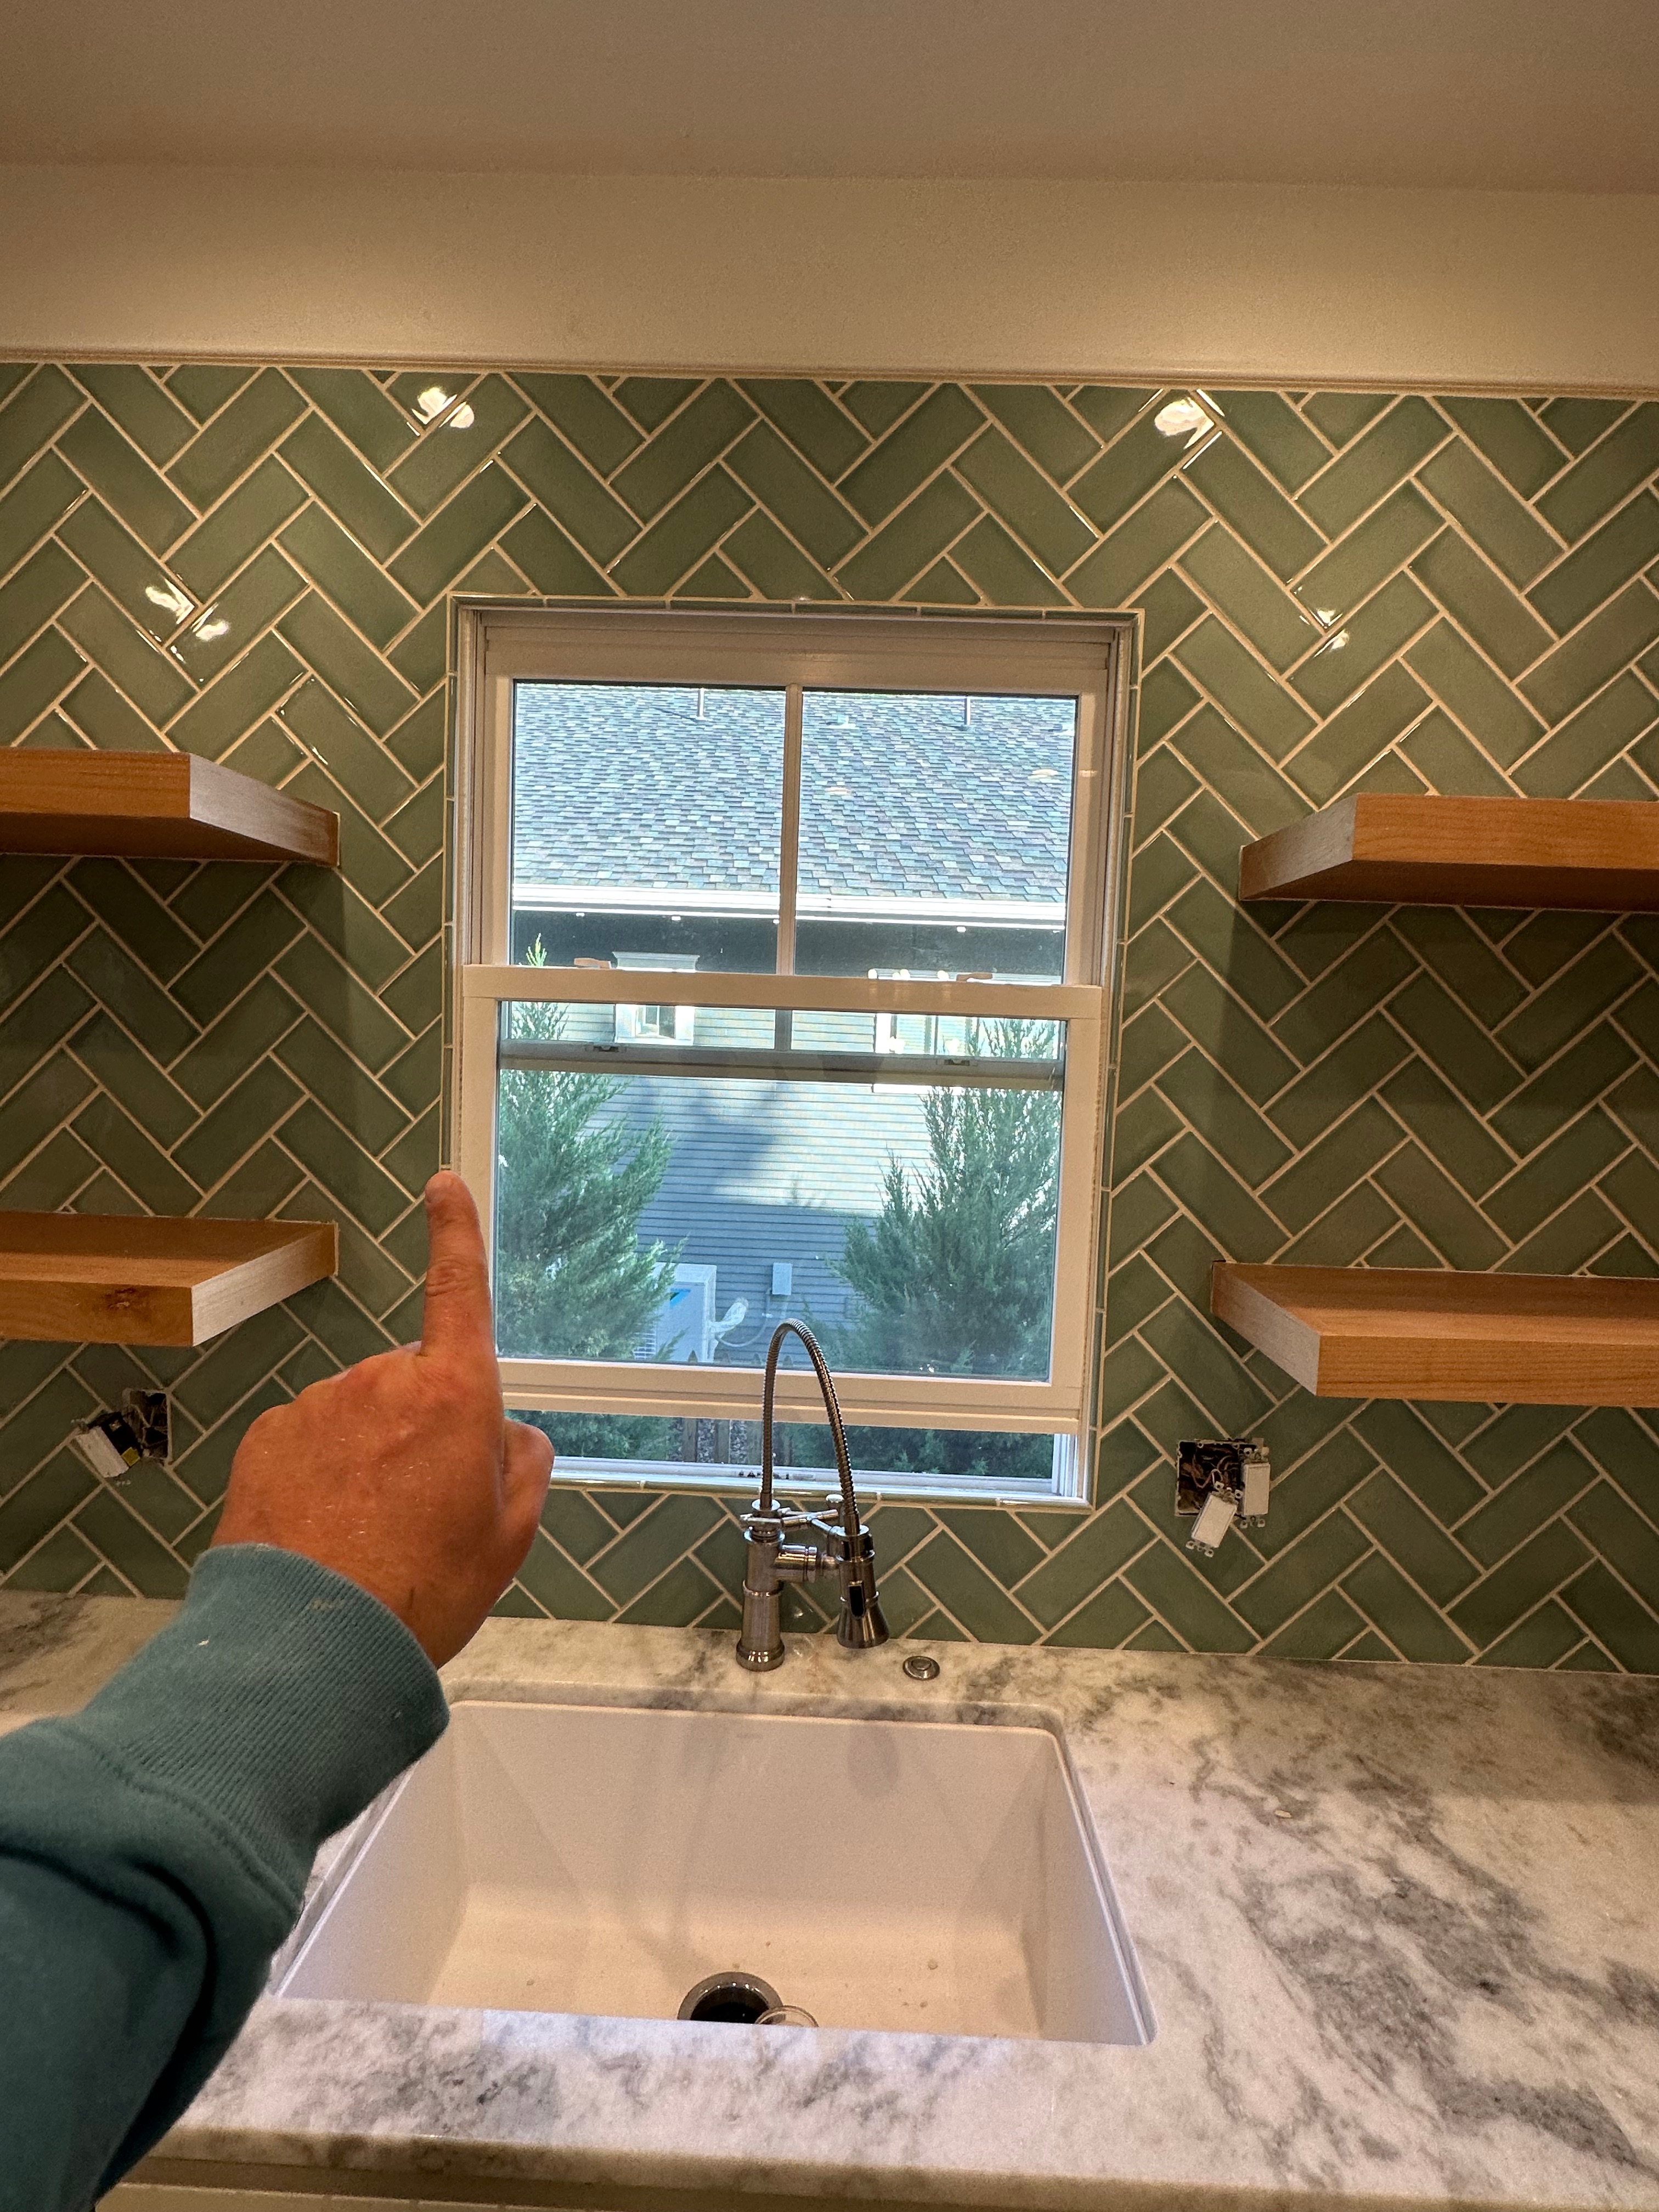
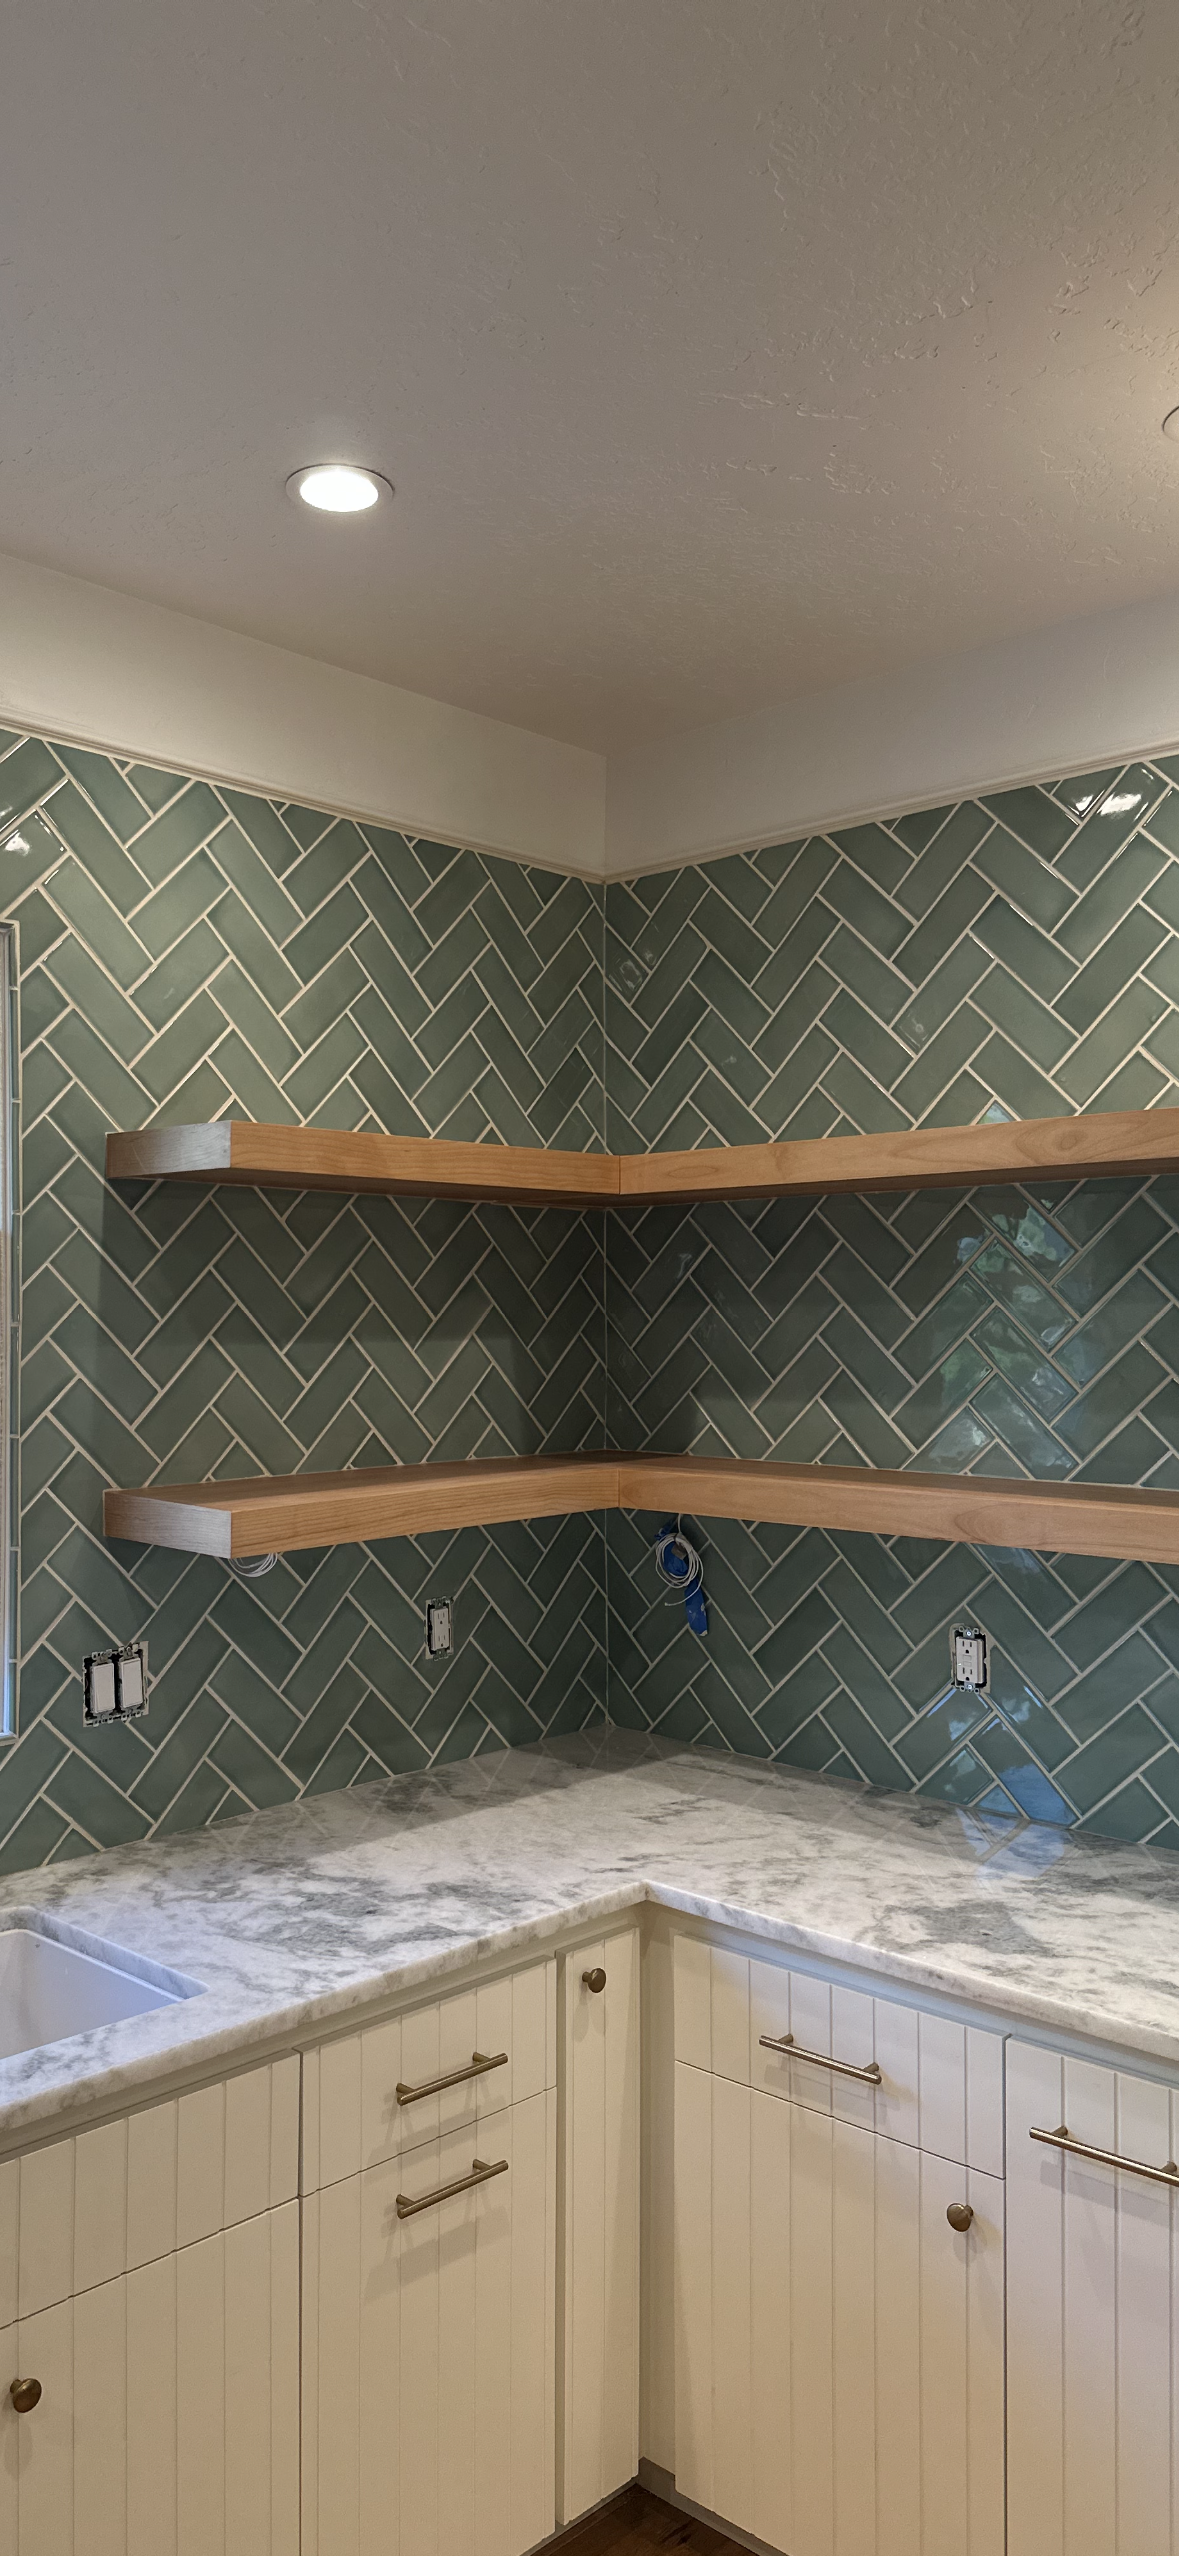
Does the pattern properly fold properly and continue through any corners? This can be extremely tricky but it’s a must for getting these herringbone patterns correct. ( **please note - Camera angle in first picture makes top and bottom section look off in photo, but from equal height and direct line of sight they fold just like the center section)

4. Keeping even cuts...
Does the same cut run evenly up any ending points - Pictured first is herringbone edge running up against cabinet. (Making sure to use a level across the tops as you tile will help to ensure the pattern runs flat and the cuts on the side remain the same size as you tile up the wall.
Second Picture is other wall ending which is enclosed on by a hand made 1/4 round trim from the tile house in Boise Idaho


5. Ending the pattern...
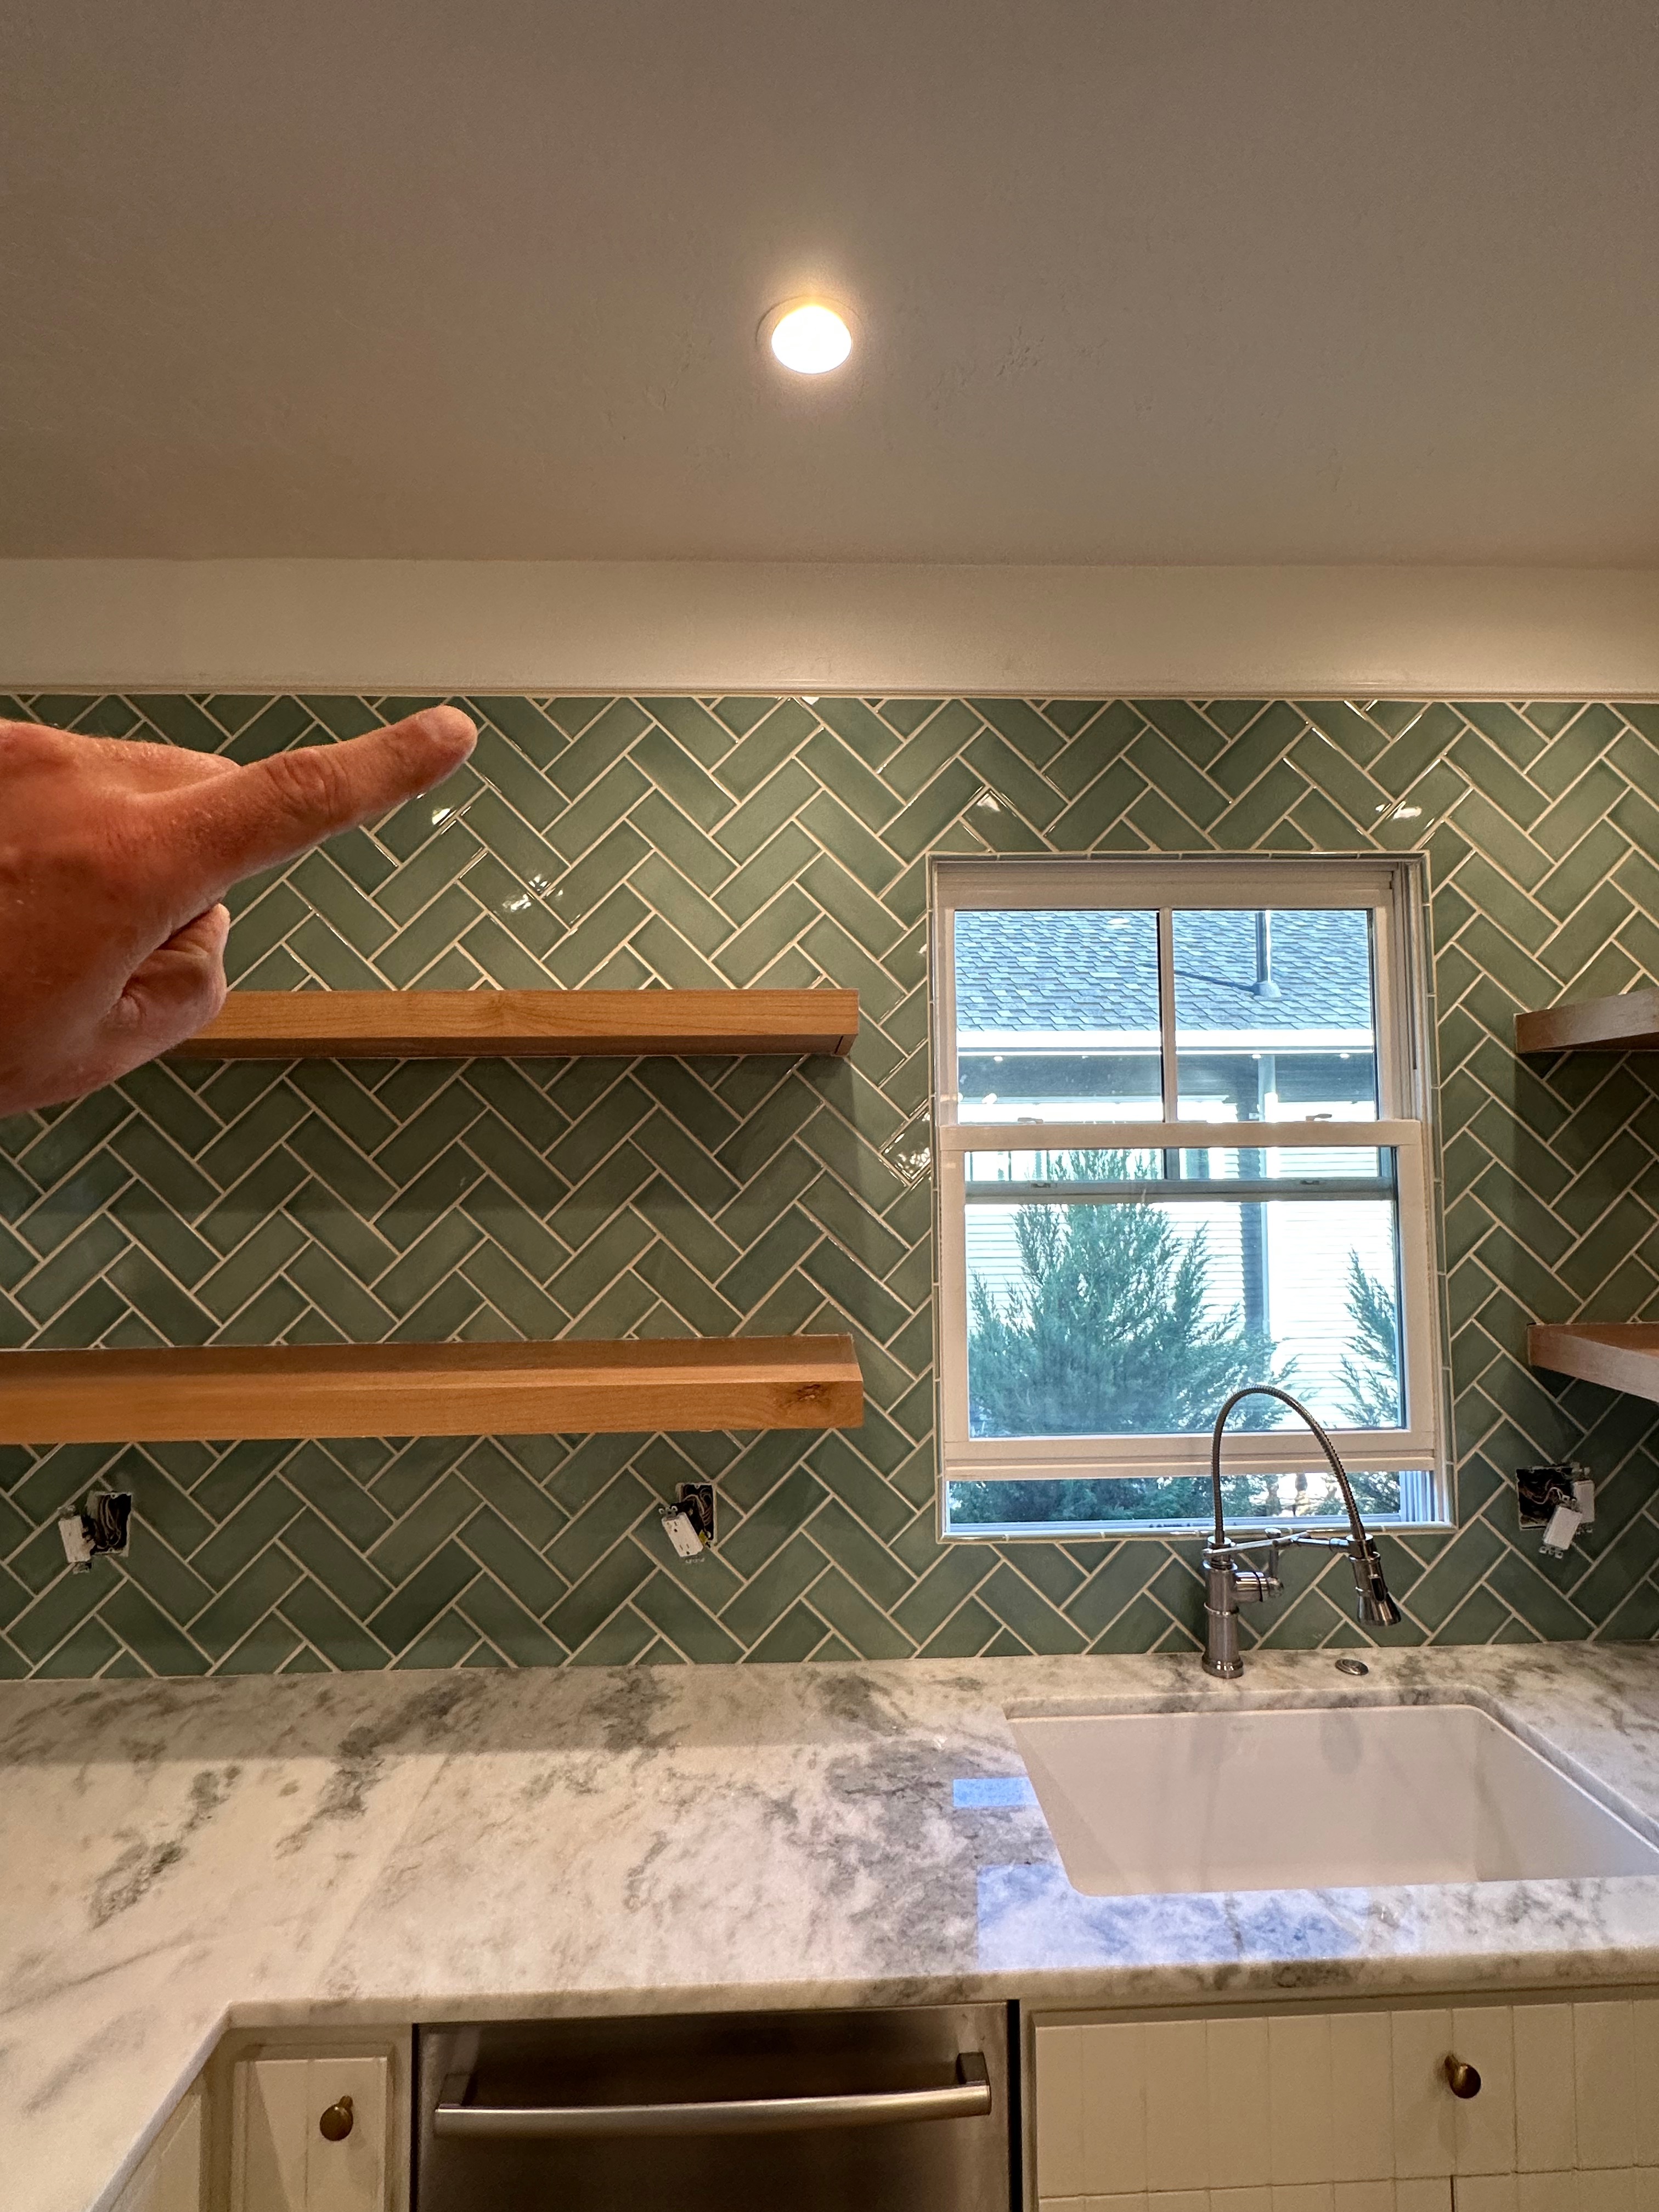
Does the same cut run all the way across my top point? This can make or break a herringbone pattern and a slight twist can throw this off. an incorrect pattern will stand out like a sore thumb! Equal cuts across the top are achieved by keeping row tops level as you build. Levels and lasers are your best friend anytime you do a herringbone tile installation.
6. Get to it!!!
Ready to try a herringbone backsplash installation of your own? I won’t lie…. The herringbone pattern has been known to test both skill and patience of its installers. But, in the end it is always worth every ounce of effort!
Wouldn’t you agree?
7. Reach out if you need help!
Timeless Creations is here to help however we can with any and all tile projects!
Be it over the internet or in person somewhere in the boise or the treasure valley... If you have a tile project and need guidance or help with the install, just give us a ring a 208-391-5009


